Our powder room facelift is going slowly… but surely! Unfortunately, I started taking apart the space and then developed some inertia about getting the wallpaper up, as I hadn’t done wallpaper in a long time, so the sad state of this space got sadder before it started getting better. Today, I put our toddler in daycare for an extra day, so I could go to Kindergarten Spring Sing at kids’ school without distraction. After the performance – which was adorable! I took full advantage of the rare stretch of several hours “off” from both my office job and my mom job by having a lunch date with hubby and pledging to get this wallpaper up!
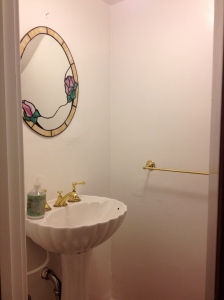
BEFORE: The whole room was very white – blah – with dated gold-tone fixtures and a pedestal sink that has no room for storage or even the soap!
A powder room is a perfect place to use wallpaper – it makes a beautiful statement, without overwhelming you visually, financially, or logistically, as you only need a small amount. I splurged big-time on the Imperial Trellis wallpaper in silver. It was pricey, but I had enough to do the powder room, as well as line the backs of our living room bookcases. I love the glow of the silver to brighten up our dark spaces.

Imperial Trellis wallpaper in silver by Schumacher. Click the picture to go their website for more information and colors.
I hung wallpaper once many years ago, so I remembered the basics, but I quickly refreshed myself with these instructions from This Old House. Some of the planning steps did not apply to me, since I was doing such a small area. I’m only hanging it above the (future) chair rail on one wall, because the ceiling slopes on the other walls (the powder room is under the stairs), and I thought the wallpaper on those walls would just draw attention to the changing ceiling line.
Here’s an overview of what I did:

TOOLS: From left, you’ll need
1. Squeegee: they make ones specifically for wallpapering, but a regular shower squeegee worked well for me.
2. Ruler or putty knife: to keep a straight line when trimming
3. Utility knife: for trimming paper at corners. Make sure it’s very sharp!
4. Pencil: for marking a plumb line.
5. Brush or roller: for applying wallpaper paste.
5. Wallpaper paste: mixed from a dry powder.
6. Sponge: for smoothing paper and wiping off excess paste.
Not shown: level or plumb line to mark a plumb starting line.
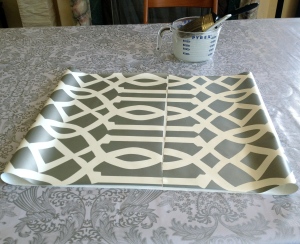
After spreading the wallpaper pasted with a brush or roller, fold the paper as shown (called “booking”) for the adhesive to set.
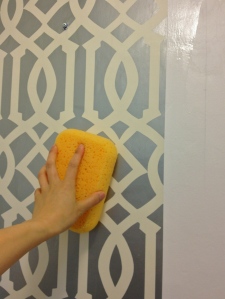
Line the first piece up with a plumb line. Then, using first a damp sponge and then the squeegee, gently smooth the wallpaper from the center towards the edges to remove bubbles and excess paste.
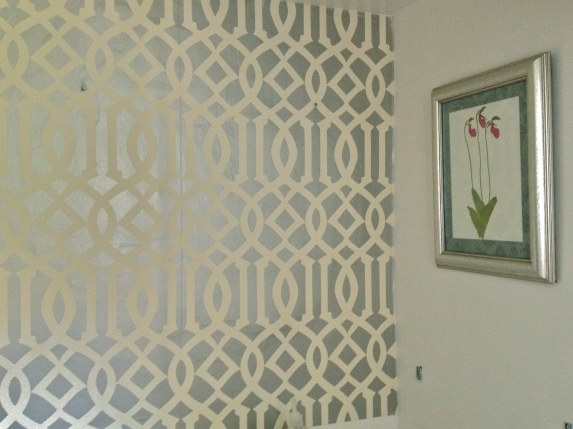
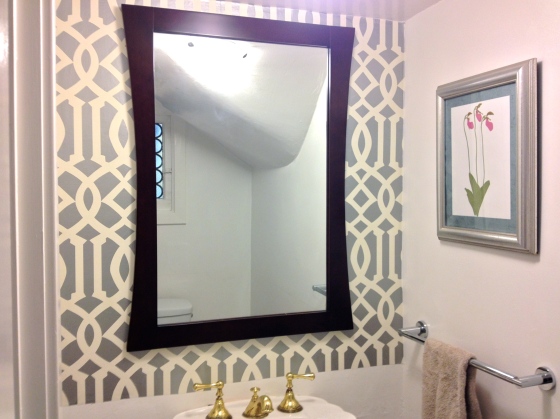
Wow! I was amazed at how the wallpaper made the room seem brighter and bigger. The silvery glow spread the light around the room, and the lines of the pattern made the space feel wider and taller.
Once the wallpaper was up, I started adding a few accessories: a large mirror which, again, helps with spreading light around the small space, a new chrome towel bar, and some art that I pulled from a calendar (more examples of this great art in an upcoming post) and put into an frame found for a few dollars at Goodwill. Again I used silver, to brighten up the room.
I am SO happy with the result so far. It’s now a pleasure to enter this room that I had been avoiding! What is the plan for the rest of the makeover? I’m going to add a chair rail and paint the area below in a warm blue-grey, like this inspiring powder room by Sarah Richardson. I’ve also got a new vanity going in to give us a little storage and counter space. Hope to post the finished room here soon!
[UPDATE: The powder room is finished! You can see it here.]

An inspiration for our powder room. Click the image to go to the image on Sarah Richardson’s website.
And on a different note, what projects on the horizon have me all excited? Check out these FREE chairs I am going to make over for my craft room/ office! I can’t wait (though maybe I should finally finish the powder room first…)
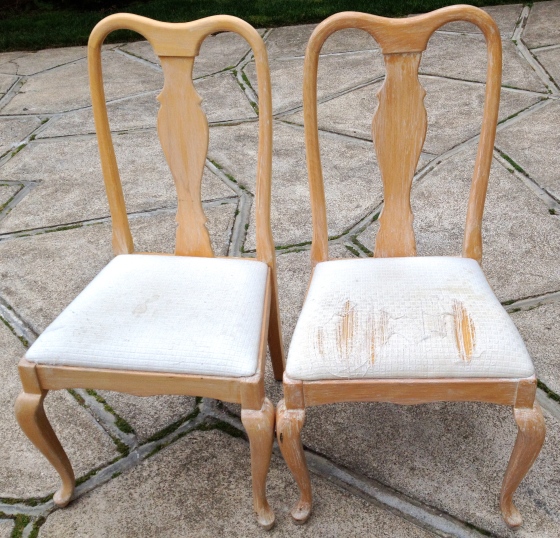
Sneak preview: A glamorous makeover is in store for these Queen Anne chairs I got for FREE through Craigslist.
“Jewels”

Thanks for sharing the tips. I love that wallpaper. Fun, but sophisticated. Beautiful job!
Love the wallpaper!
Absolutely love the new powder room! The wallpaper really makes the space!
Pingback: Art Clips for Kids’ Fridge Gallery « Jewels at Home
Pingback: Laundry Area Organization: Loads of Charm « Jewels at Home
Pingback: DIY Decorative Trays – Ten Great Ideas « Jewels at Home
Pingback: New Powder Room – Chair Rail and Baseboard « Jewels at Home
Pingback: Powder Room Reveal – Tiny Silver Gem « Jewels at Home